


Introduction
Nothing is more frustrating than investing time and money into a fresh set of lash extensions only to find that a few have gone crooked, twisted, or clumped together. Lash extensions are meant to create a flawless, seamless frame for your eyes, but uneven placement or daily wear can cause certain lashes to look bent, misplaced, or out of alignment. Many people assume that once extensions are crooked, the only solution is to remove them altogether. However, removing a full set prematurely not only wastes your investment but can also weaken your natural lashes.
The good news? There are several safe, effective methods to fix crooked or uneven lash extensions without taking them off entirely. By learning how to properly assess the issue, clean, separate, and gently re-align extensions, you can extend the life of your set and keep your lashes looking polished.
In this comprehensive guide, we’ll break down the step-by-step methods lash professionals and experienced wearers use to correct crooked DIY lash extensions. From spoolie brushing to using tweezers safely, micro-swab re-bonding, and heated lash curlers, we’ll explore conservative techniques that preserve retention and natural lash health. We’ll also discuss when to try at-home fixes versus when to leave it to your lash tech.
By the end, you’ll have a practical toolkit for handling minor crookedness at home and a clear understanding of when professional correction is the safest choice.
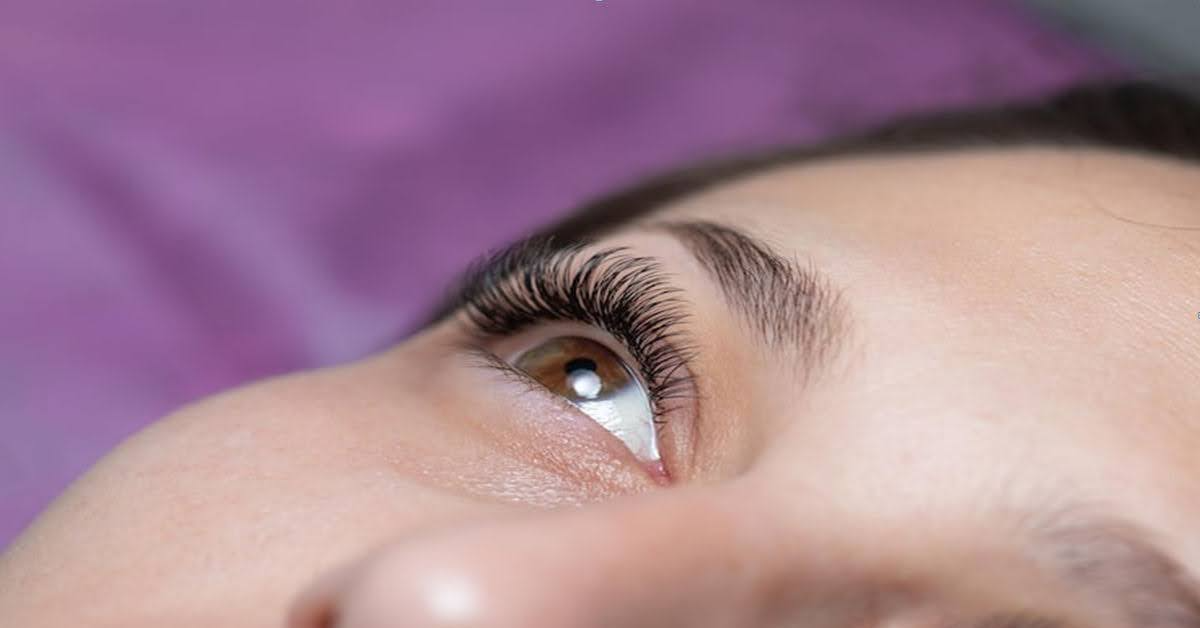
1. First step: assess the problem
Before jumping into fixes, the first thing you should do is carefully assess what’s really going on with your lashes. Not all crooked extensions are the same, and the type of problem determines the right solution.
Crookedness can show up in several ways. Sometimes, an extension is twisted slightly around its natural lash, making it look bent or flipped. Other times, two extensions or an extension and a natural lash may be stuck together — a problem known as “fusion.” In some cases, the angle of placement is simply off, so the extension sticks out at a different direction than surrounding lashes. Another common issue is curl mismatch, where an extension flips upward or downward after sleeping on it.
To assess safely, use a bright, well-lit mirror and a clean spoolie brush. Look closely at the base of your lashes where the extension meets the natural lash. If the extension feels loose and “rocks” when you touch it gently, that’s a sign it may need professional removal and replacement. However, if the adhesive bond is intact and the lash is only slightly misaligned, it can often be corrected at home.
Think of this stage as diagnosis before treatment. Much like a hairstylist wouldn’t cut before understanding the hair texture, you should avoid tugging or manipulating until you know exactly what you’re dealing with.
2. Gentle cleaning first: remove oils and debris
One of the most overlooked steps in correcting uneven lash extensions is simply cleaning them properly. Oils, makeup residue, and environmental debris can cause lashes to clump together or lose their shape. Cleaning resets the surface, making it easier to realign crooked lashes.
Experts recommend using an oil-free lash cleanser or a specially formulated foaming lash shampoo. Never use makeup wipes or oil-based removers, as these can break down the adhesive. To clean, dip a lint-free pad or micro-swab into the cleanser and gently wipe along the lash line. Avoid scrubbing; instead, use light dabbing motions. After cleansing, rinse with cool water and allow the lashes to air dry completely.
Why is this so important? Because dirty lashes are slippery and harder to manipulate. Any attempt to separate or realign lashes without first cleaning increases the risk of tugging on natural lashes. Proper cleaning also supports long-term retention. According to lash experts, daily gentle cleansing is one of the most effective aftercare habits for preventing crookedness in the first place.
This step alone can often fix minor twists, since a buildup of oil or mascara residue is sometimes what’s holding lashes in the wrong position.
3. Re-align with a spoolie
The spoolie is your first and most effective tool for fixing crooked lash extensions. This little brush, similar to a clean mascara wand, can often correct minor misalignments in seconds.
Here’s how: start by brushing downward first, which helps separate and “reset” the lashes. Then, gently brush upward and outward, following the natural curve of the lashes. Focus on the base and middle of the lash, rather than tugging on the tip. This prevents unnecessary stress on the adhesive bond.
Regular spoolie use should be part of your daily lash maintenance routine, ideally once in the morning and once at night. Not only does it help fix crooked lashes, but it also keeps your extensions fluffy and prevents tangling.
For example, if you wake up with a few lashes sticking out at odd angles, a quick brushing session with a spoolie often brings them back into place. Lash professionals frequently stress that brushing is the simplest and safest corrective method for clients to use at home.
So, before attempting more advanced techniques, always start with a spoolie. You’d be surprised how often this easy fix works.
4. Using tweezers safely to separate stuck lashes
When lashes are clumped together or fused, brushing alone may not be enough. In these cases, tweezers can be useful — but only if handled with care. Improper tweezer use risks pulling out natural lashes or breaking extensions.
Start by ensuring your tweezers are sanitized. Precision isolation tweezers, often curved or angled, work best for lash separation. Position yourself in front of a mirror with good lighting. Gently support the natural lashes with one hand while using tweezers in the other to isolate and separate the stuck extensions. The movement should be small and controlled, almost like wiggling rather than pulling.
One key rule: never pull downward on the extension. The adhesive bond is strongest at the base, and tugging risks damage. Instead, aim to “slide” the extensions apart gently. Resting your tweezer-holding hand on your cheekbone helps stabilize your movements and prevents slips.
This technique is borrowed from professional isolation methods lash techs use when applying extensions. With patience and the right tools, you can often separate minor fusions at home. However, if more than two lashes are stuck together, or if separation feels painful, it’s best to stop and see a professional.
5. Micro-swab re-bonding method for a loose base
Sometimes, the problem isn’t crookedness caused by tangling but rather a slightly loose extension base. In these cases, re-bonding with a professional lash bonder can help.
Re-bonding involves using a micro-swab to apply a tiny amount of lash bonder at the base of the extension where it meets the natural lash. This seals the bond and stabilizes the extension without requiring full removal.
The process is straightforward but requires care: first, clean and dry the lashes. Dip a lint-free micro-swab into a drop of lash bonder (specifically formulated for extensions). Dab very lightly at the adhesive junction, ensuring no product touches the skin. Allow the bonder to cure fully according to manufacturer instructions.
This method should only be done with lash products designed for re-bonding, never with random glues or adhesives. Using the wrong product can damage both natural lashes and extensions.
For example, Lashbox LA’s LBLA Bond provides detailed instructions for safe micro-swab application, highlighting the importance of avoiding oversaturation and skin contact.
While not a fix for every crooked lash, re-bonding is an excellent tool when the extension is stable but slightly lifting.
6. Heat and shape — using a safe heated lash curler
Bent or flipped extensions are often the result of sleeping positions or accidental pressure. A heated lash curler can sometimes reshape them. Unlike traditional clamp curlers, these tools use gentle heat to lift and re-form lashes.
To use safely, set the curler to a low temperature. Hold it under your lashes for a few seconds, then gently press upward. Repeat short passes rather than prolonged heat exposure. Always ensure lashes are completely clean and dry before using heat.
Heated curlers are especially helpful for fixing curl mismatches — for example, when one lash flips downward while the rest curl upward. They can also smooth out bends caused by side sleeping.
However, caution is key. Never use high heat, and avoid curling lashes that feel brittle or damaged. Lash experts emphasize that while heated curlers are effective, misuse can weaken extensions.
When used correctly, though, this is one of the quickest fixes for lashes bent out of shape.
7. When to use a lash sealant/bonder
A lash sealant or bonder isn’t meant to realign crooked lashes directly, but it plays an important role in prevention and retention. Sealants work by coating the adhesive bonds, creating a barrier against oils, sweat, and humidity.
After fixing a crooked lash with a spoolie or tweezers, applying a sealant can help “lock in” the correction. Use a small applicator to apply product sparingly along the adhesive line — not the entire lash. Overuse can make lashes stiff or clumpy.
Research and product guides show that lash sealants can extend retention time and help protect lashes from environmental factors. However, it’s important to note that they are not substitutes for proper placement or isolation. If the adhesive bond is failing, sealant will not correct the problem.
Think of sealant as insurance: it won’t fix crookedness on its own, but it prevents freshly aligned lashes from shifting again too quickly.
8. Correcting larger mapping/placement errors without full removal
Occasionally, crookedness isn’t just about one or two lashes. Sometimes, the issue is a larger mapping or placement error. For example, extensions may be too long in the outer corners, creating a droopy effect, or multiple lashes may be placed at inconsistent angles.
In these cases, a lash professional can often perform selective removal and spot reapplication instead of taking off the entire set. For instance, if the outer corner appears too heavy, the tech may remove six to ten extensions in that area and replace them with shorter, lighter ones. This correction balances the lash map without discarding the rest of the set.
Another option is layering — adding new extensions strategically over misplaced ones to even out the appearance. This technique requires skill but can dramatically improve symmetry and overall look.
The advantage of these corrective methods is that they save both time and money compared to full removal and a new set. They also reduce stress on natural lashes, since only problematic extensions are manipulated.
9. At-home quick fixes vs in-salon corrections — pros and cons
It’s important to distinguish what you can safely handle at home versus what should be left to professionals.
At-home safe steps include:
-
Cleaning with oil-free lash shampoo.
-
Daily spoolie brushing.
-
Using cool air from a hairdryer on low to fluff and separate lashes.
-
Gentle tweezer use for minor two-lash fusions.
What you should never attempt at home: plucking extensions, using non-professional adhesives, or soaking lashes in oils to “reset” them. These can cause lash loss or irritation.
Salon corrections are required when:
-
Extensions are rocking at the base or adhesive is on the skin.
-
Multiple lashes are stuck together in clusters.
-
There is redness, discomfort, or suspected infection.
-
Mapping errors affect the overall design.
When visiting a lash tech, bring photos or describe when the problem started. This helps the technician identify whether it’s an application error, a natural lash growth issue, or aftercare habit.
Experts consistently note that while minor fixes can be done at home, adhesive and mapping issues should be corrected professionally to avoid risking natural lash health.
10. Preventing future crookedness: technique and aftercare tips
The best solution is prevention. By combining good aftercare with proper professional technique, crooked or uneven extensions become much less likely.
For clients, prevention means:
-
Avoiding oil-based skincare and makeup near the lash line.
-
Sleeping on your back or using a silk pillowcase to reduce friction.
-
Brushing lashes gently with a spoolie every morning.
-
Washing lashes daily with an oil-free cleanser.
-
Avoiding rubbing or pulling at the eyes.
-
Scheduling refills every 2–3 weeks, depending on natural lash growth.
For lash technicians, prevention requires:
-
Proper isolation of each natural lash during application.
-
Using the right length, curl, and thickness for each section.
-
Correct adhesive use — ensuring it’s fresh, properly cured, and applied sparingly.
-
Mastering taping and layering techniques to avoid overlapping.
It’s also important to set realistic expectations. Even with perfect application and care, some crookedness is normal over time because natural lashes grow and shed at different rates. The key is maintenance — quick fixes and regular fills will keep your set looking flawless.
Conclusion
Crooked or uneven lash extensions are a common frustration, but they don’t have to mean the end of your set. With the right tools and knowledge, many minor issues can be corrected safely at home, extending the life of your extensions and protecting your natural lashes.
The key is to take a tiered approach. Start simple: clean your lashes thoroughly and brush with a spoolie. If that doesn’t solve the problem, try gentle tweezer separation or, in specific cases, micro-swab re-bonding. For bent or flipped lashes, a heated curler can restore shape. Sealants add extra protection, while professionals can step in for larger mapping corrections.
Most importantly, know your limits. If the adhesive is lifting, multiple lashes are fused, or discomfort occurs, it’s time to book an appointment with a lash technician. Prevention through good aftercare — like regular cleaning, brushing, and avoiding oils — reduces the likelihood of crooked lashes in the first place.
Here’s a simple action plan to keep your extensions looking flawless:
-
Assess the problem carefully before touching.
-
Clean lashes with oil-free cleanser.
-
Brush daily with a spoolie to maintain alignment.
-
Fix minor issues with tweezers, curlers, or sealants when safe.
-
Seek professional help for major adhesive or mapping problems.


Share:
10 Tools Every DIY Lash Lover Needs in Their Kit
The “Less Is More” Rule: How to Avoid Overloading Your Lashes